A Nice AppCenter Distribution Alternative On The Cheap
TLDR
If you use AppCenter Distribution but not AppCenter’s CI, you can take advantage of Bitrise’s over-the-air app distribution without having to switch your CI.
Intro
Working at Bitrise, I’ve met >200 mobile teams that use AppCenter. If your team is like these teams, you use Github Actions, Azure DevOps, or some other tool to power your continuous integration, and your AppCenter usage is limited to their app distribution functionality.
AppCenter Distribution is a really convenient way to distribute internal builds to your testers (i.e. for each PR), especially if you are already a Microsoft shop. You might have even gotten AppCenter included for free in your Microsoft license.
Now that AppCenter is being shut down, you’ll need a replacement for distributing those internal builds. Bitrise Install Pages can provide that for you. I’ll show you how to do that below.
There are other options for app distribution like Fastlane S3. So why use Bitrise? For one, you don’t have to bother with AWS. You’ll find that using Bitrise quite simple. And you’ll benefit from continuous improvements like the central artifact page, which will provide filters for testers to quickly find the app executable they need.
⚠️ If you need a replacement for AppCenter CI (or you are already using Bitrise for CI), then you don’t need to read this post. OTA distribution is automatically enabled in Bitrise CI, so just set up a CI workflow in Bitrise and you’ll have OTA distribution out of the box. This article describes some workarounds to integrate with non-Bitrise CI providers. I hope that in the future we’ll provide more native integrations with non-Bitrise CI providers so that the workarounds in this article become unnecessary.
Bitrise Install Pages
Bitrise’s install pages enables quick sharing and installation of mobile app builds. By generating an install page for an app, you have a shareable a URL that can be sent via Slack, Teams, etc to testers or stakeholders, granting them access to install the latest build on their devices over the air without the need for them to use development tools or have direct access to the source code. OTA installation simplifies the distribution process, making it efficient to get feedback on each version of your app.

How to get this for cheap or free on Bitrise
The install page feature doesn’t cost anything, actually. Bitrise assumes that you build your app using Bitrise CI, it charges based on CI usage volume. So if your build activity is happening elsewhere, then if you can figure out how to get your IPA or APK into Bitrise without building it there (which I will show below), you can get the Install Page for free or cheap.
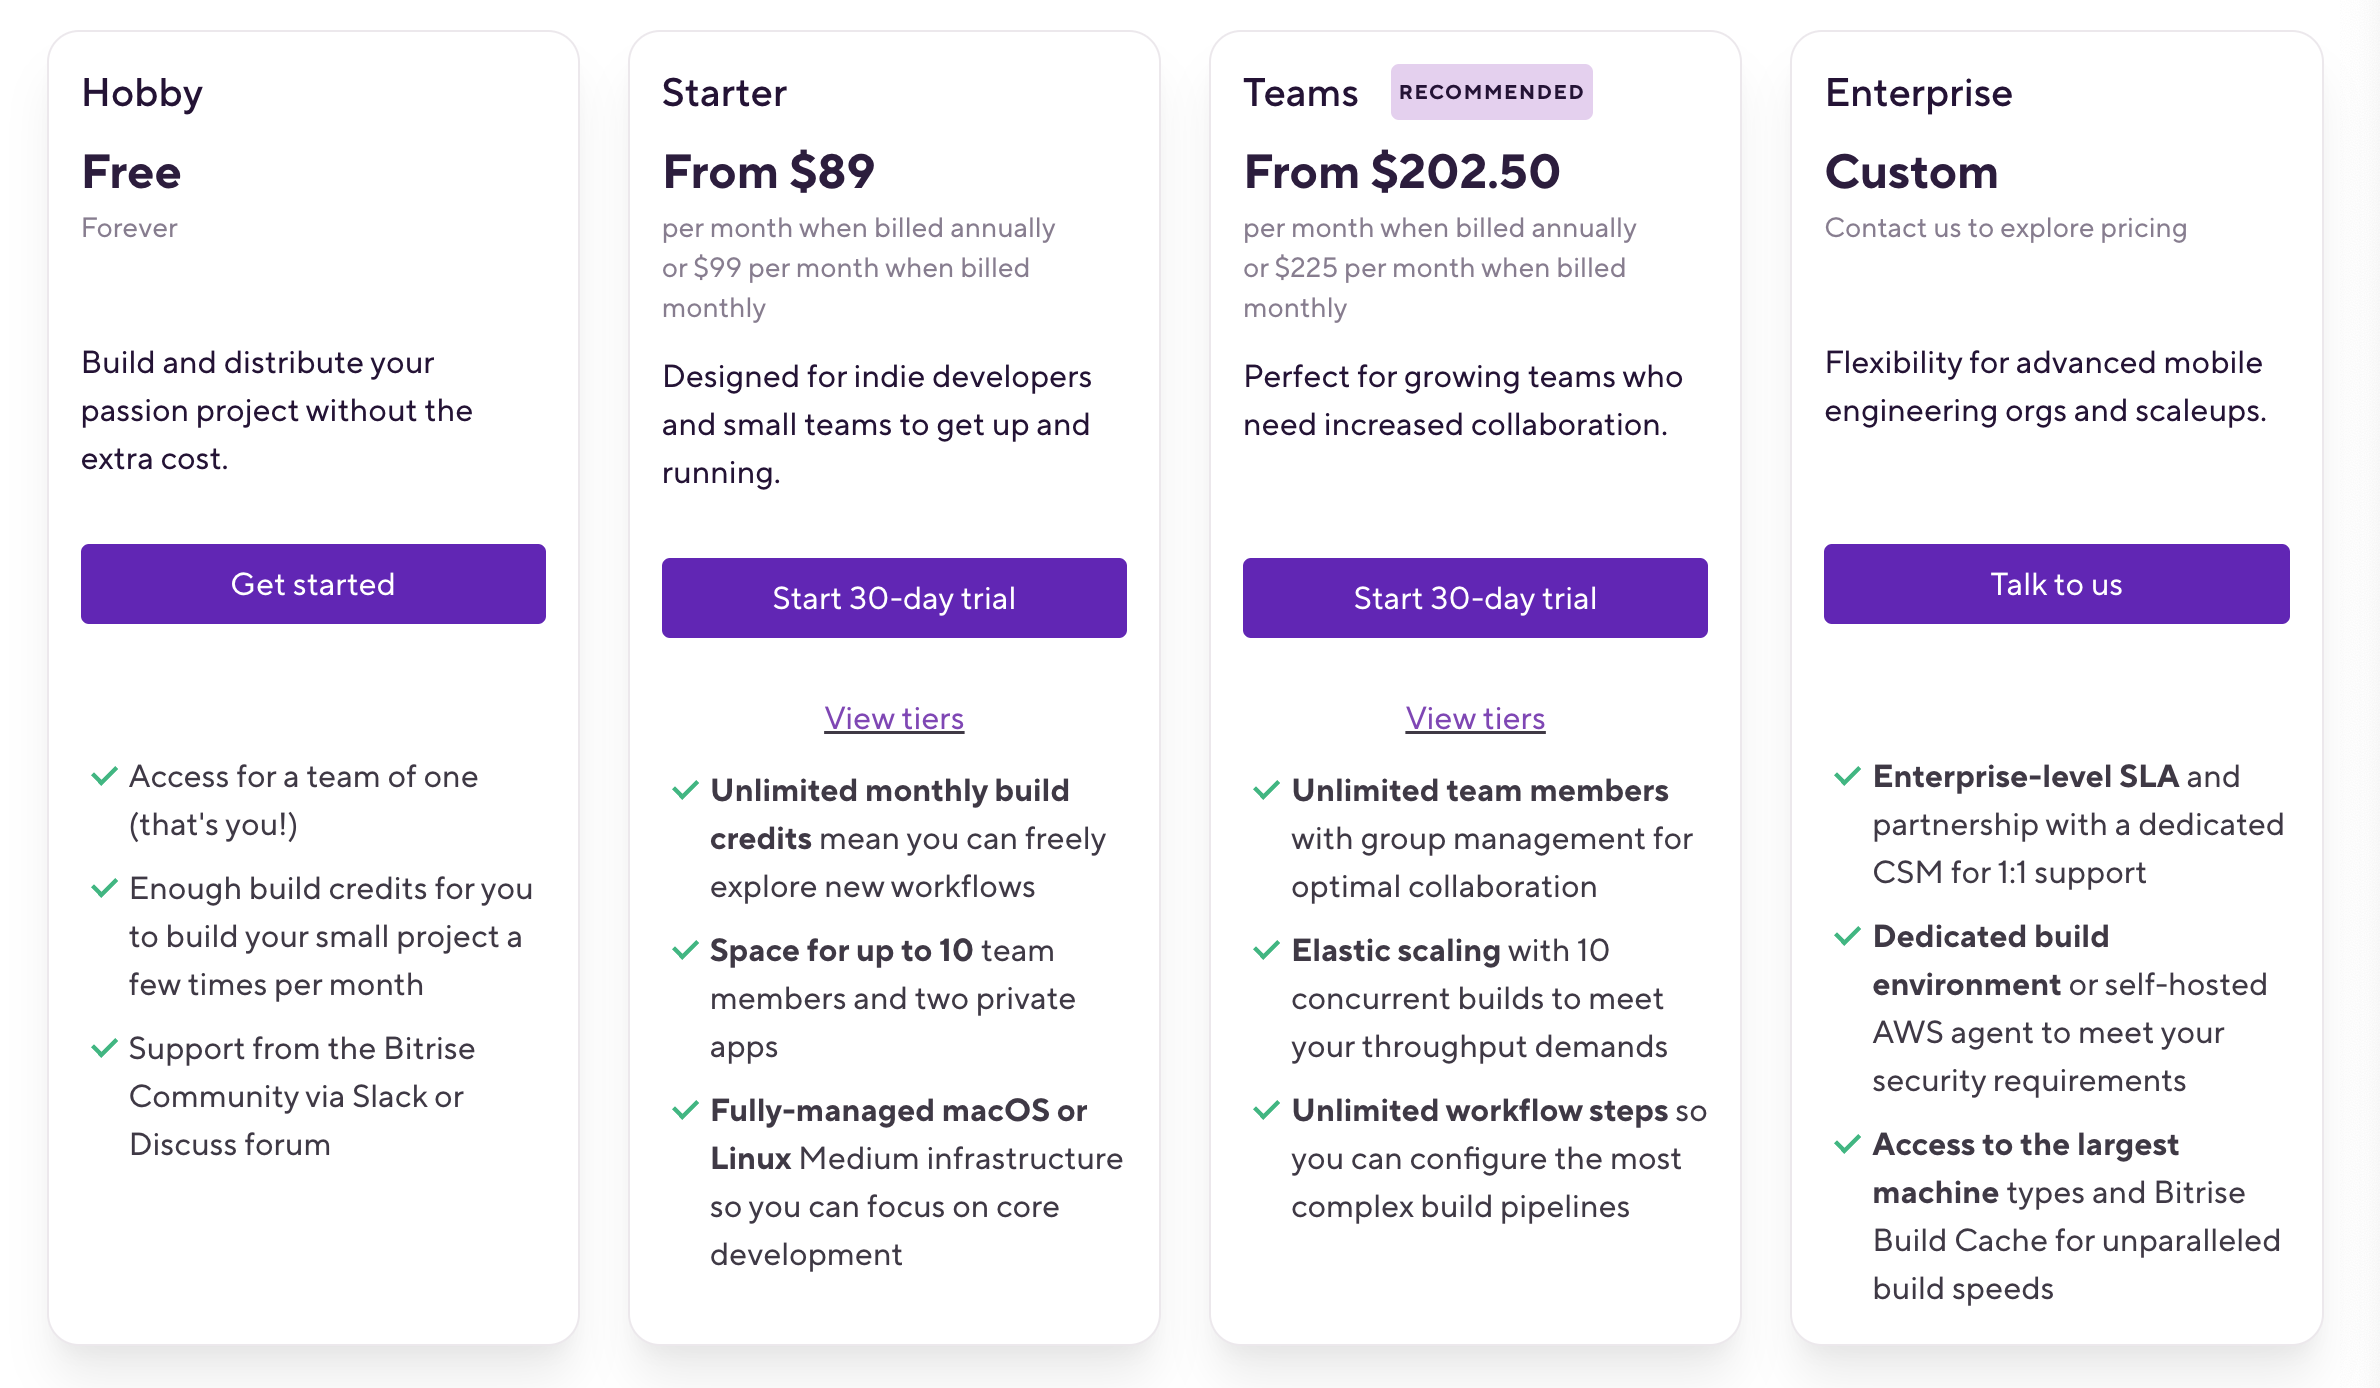
The particular pricing tier you’ll land on will largely depend on the number people from your team will create user accounts in Bitrise. However, using an install page does not necessarily require a user account, so if you had just one user that manages the Bitrise workspace, you could fit on the free “Hobby” tier. (But unless you’re a tiny, cash-strapped company or nonprofit, I’d request you use a paid tier)
Example project using Bitrise Install Pages with non-Bitrise CI
In this example, I’ll be building an app in Github Actions using Fastlane, but you can extend this idea to whichever CI tool you are currently use.
Fastfile
Below is my Fastfile. There’s nothing fancy here. Just a simple call to match for code signing files and then build_app
default_platform(:ios)

platform :ios do
  desc "Push a new beta build to TestFlight"
  lane :beta do
    setup_ci if ENV['CI']
    match(type: 'development', readonly: true, git_private_key: ENV['MATCH_DEPLOY_KEY'])
    build_app(scheme: "Addly", export_method: "development", configuration: "Debug", build_timing_summary: true)
  end
end
Create your Bitrise project
With a Fastfile in place, create an account on bitrise.io and use the Add New App wizard to create a new project.
The wizard is pretty easy to use, so I will not describe every step here, but there are a few steps that need extra explaining.
In the “Select repository” step, select the “Add URL manually” option and paste in a public HTTPS git URL. Since you’re not building your own app, you don’t need to give Bitrise access to any source code. So trick Bitrise into continuing by giving an arbitrary, public repo.
You can skip authorization in the next step since you’re using a public repo.
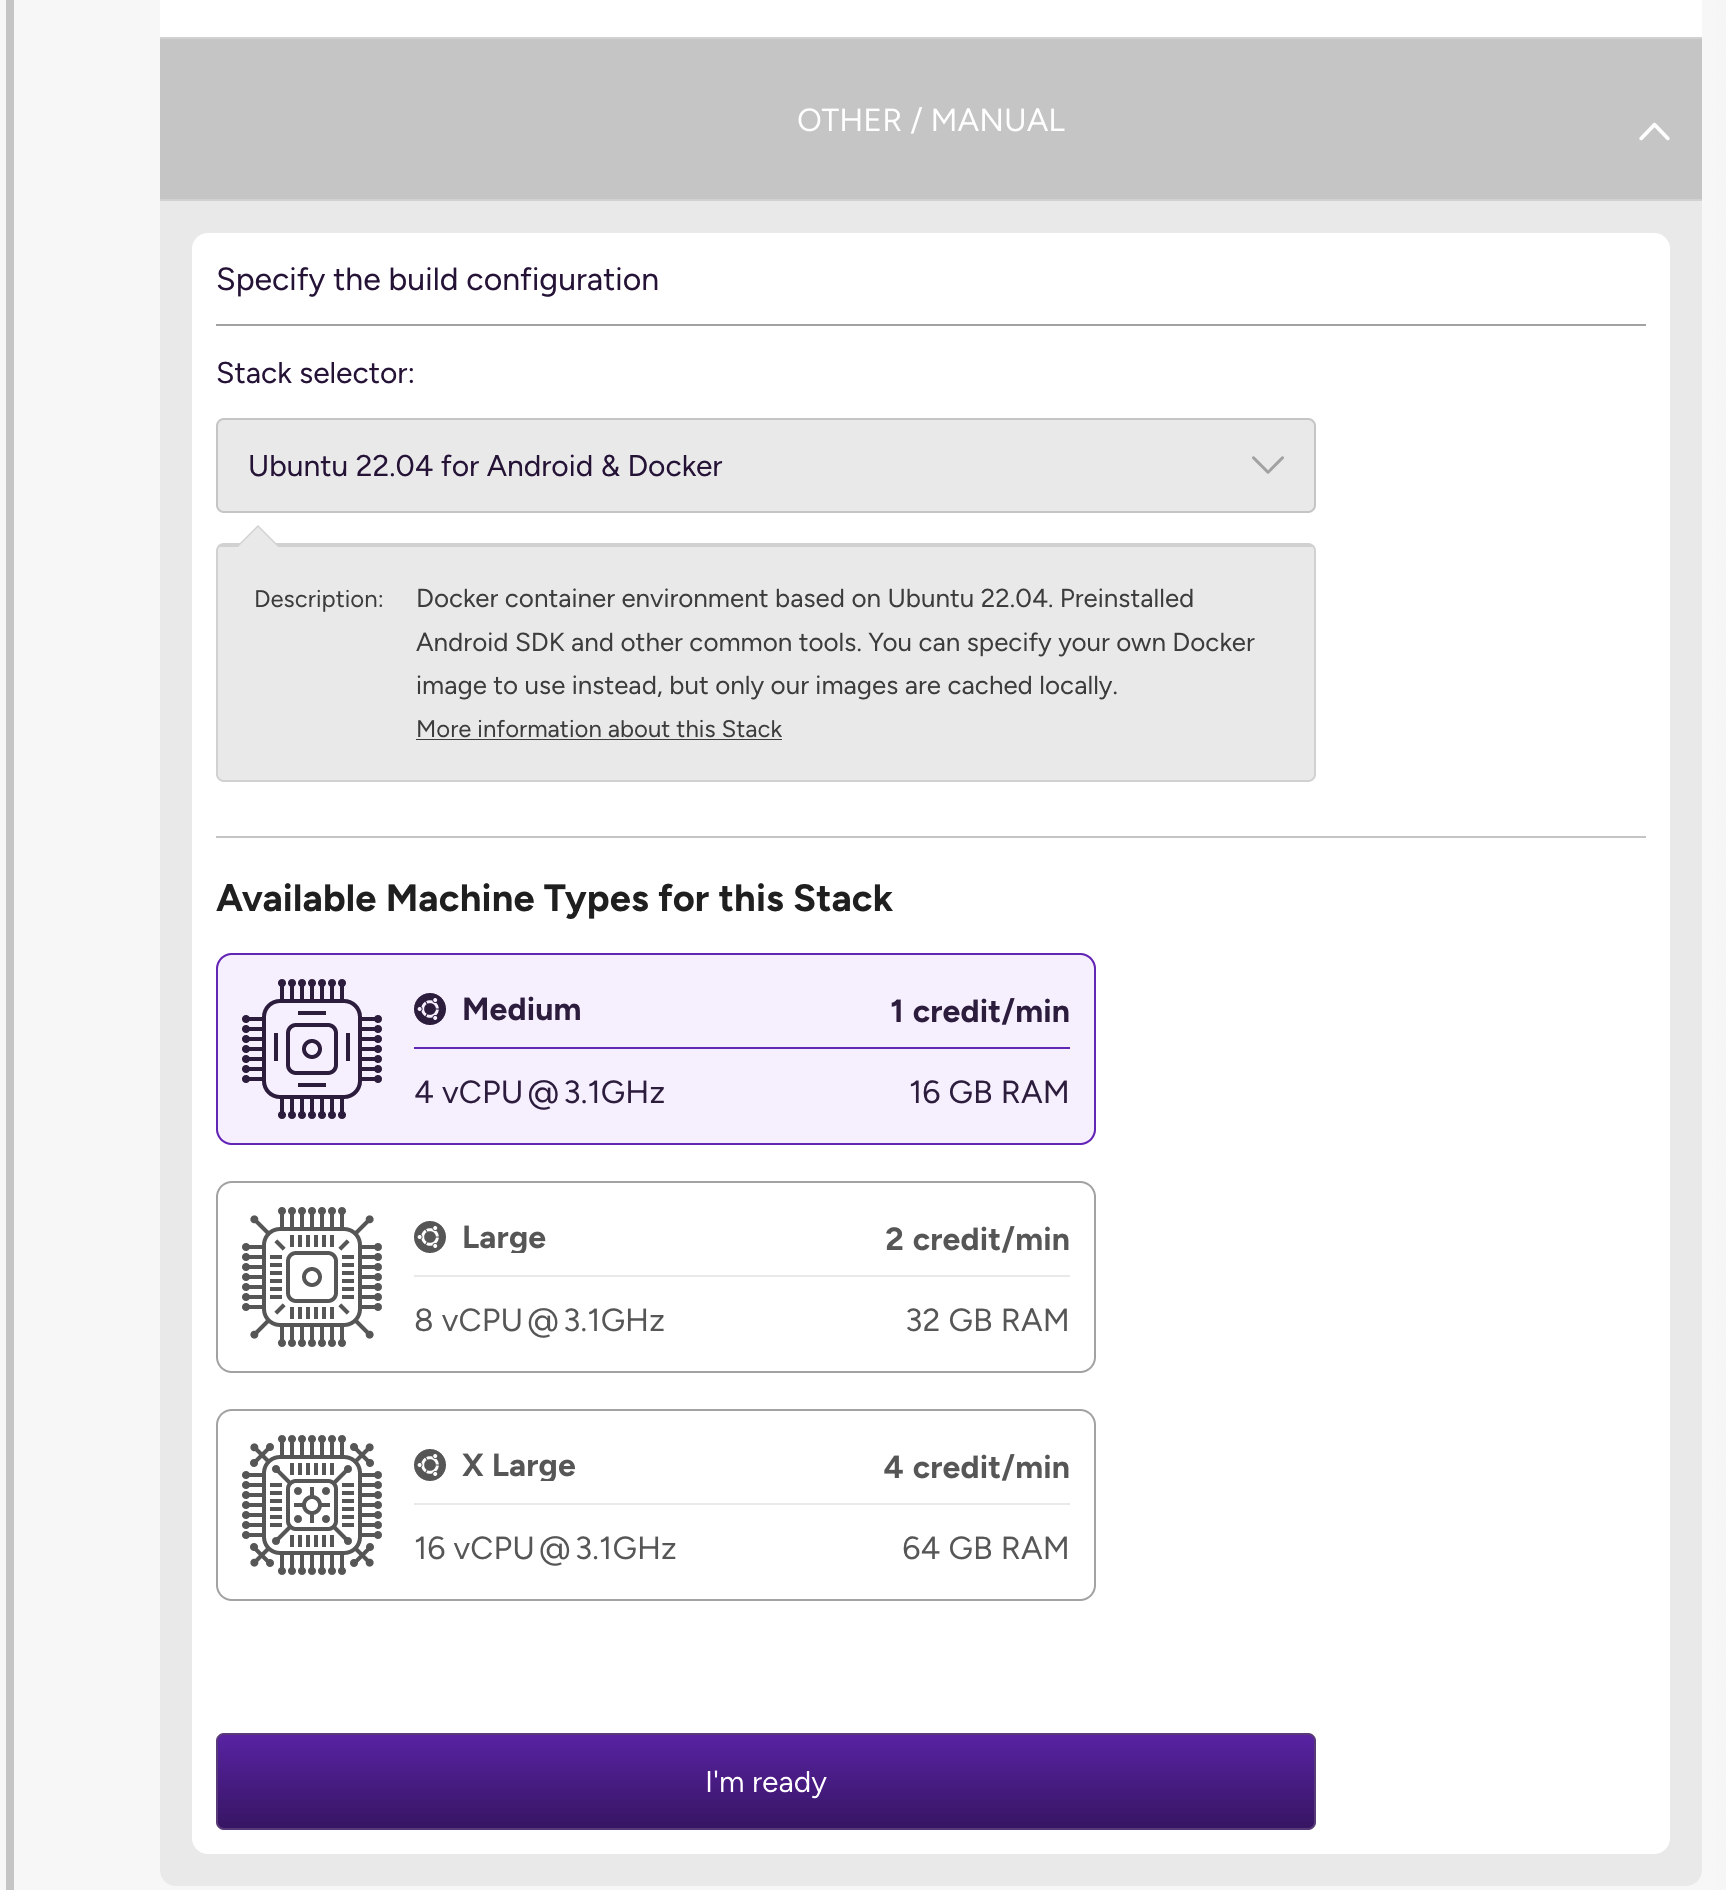
Bitrise is going to try to set up default CI workflows for you based on the details of the project. Remember, you’re not actually using Bitrise for CI, so you can skip past this by clicking selecting “Other/Manual” as your project type.
For stack selector, I recommend using the smallest Linux runner to keep things as low-cost as possible.
Click through the remaining steps of the wizard and you now have an app. By the way - the Bitrise app name is taken from the Git URL you provided earlier, so you can go to App Settings and update the name of your app to your actual app name.
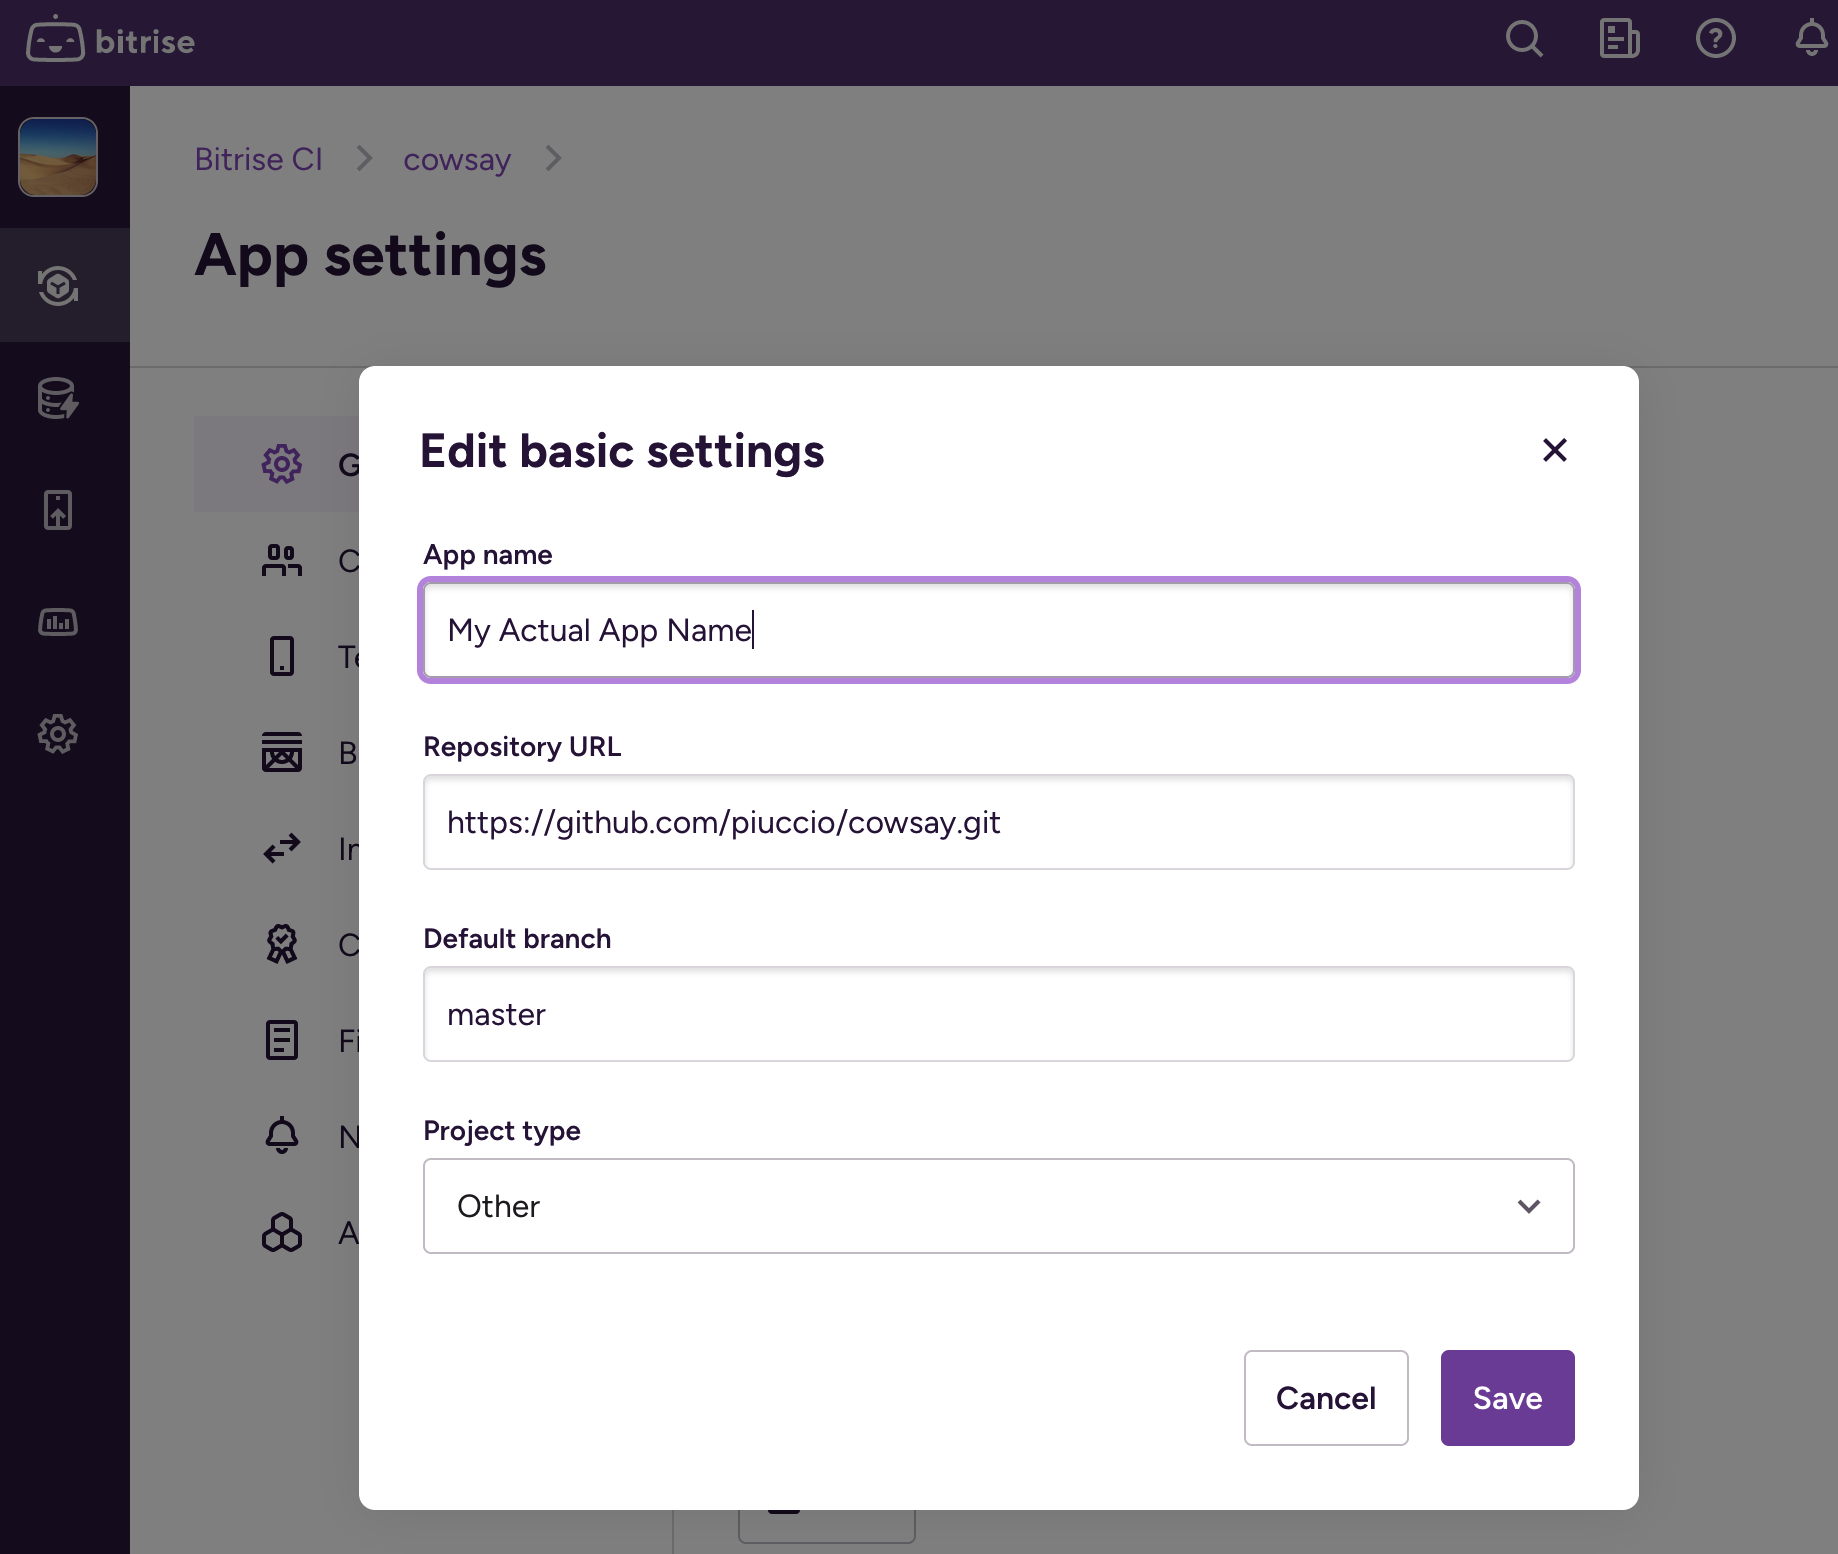
Now that your app is created and properlynamed, you’re going to need to create an access token that will be used later, in the Github Actions job. You’ll also need to take note of the app slug of your Bitrise app, which can be identified in the URL of your app.

Let’s pause here and set things up in Github Actions. Then we’ll jump back to Bitrise.
Github Actions workflow definition
Below is my job definition for Github Actions. This job first checks out my actual app source, then loads the match credentials for use by the fastlane lane that subsequently runs. The IPA file that gets produced is uploaded as a Github Actions artifact. And finally, the most interesting step is the last one. It’s triggering a Bitrise build and passing the artifact id of the IPA file as an env var into the Bitrise build.
jobs:
  build:
    runs-on: macos-latest
    steps:
      - uses: actions/checkout@v2
      - uses: webfactory/ssh-agent@v0.9.0
        with:
          ssh-private-key: $
      - run: bundle install
      - run: bundle exec fastlane ios beta
        env:
          MATCH_PASSWORD: $
          DEVELOPER_DIR: /Applications/Xcode_15.3.app/Contents/Developer
      - uses: actions/upload-artifact@v4
        id: artifact-upload-step
        with:
          name: Addly.ipa
          path: Addly.ipa
      - name: Trigger Bitrise Build
        run: |
          curl -X POST "https://api.bitrise.io/v0.1/apps/$/builds" \
          -H "Authorization: $" \
          -H "Content-Type: application/json" \
          -d '{
                "hook_info": {
                    "type": "bitrise"
                },
                "build_params": {
                    "environments": [
                        {
                            "mapped_to": "ARTIFACT_ID",
                            "value": "$",
                            "is_expand": true
                        }
                    ]
                }
              }'
Finishing by defining the Bitrise workflow
Our Bitrise workflow, shown below, is going to use the artifact id to download the IPA file from Github Actions using Github’s API. It then re-publishes the file to Bitrise, where the default behavior is to create an install page for artifacts of type IPA and APK. This produces a BITRISE_PUBLIC_INSTALL_PAGE_URL env var, which is used by the final step the Bitrise Slack step, which sends the install page URL to the team Slack channel.
---
format_version: '13'
default_step_lib_source: https://github.com/bitrise-io/bitrise-steplib.git
project_type: other
workflows:
  distribute_app:
    steps:
    - script@1:
        inputs:
        - script_file_path:
        - content: |-
            #!/usr/bin/env bash
            set -e
            set -o pipefail

            curl \
              -H "Accept: application/vnd.github.v3+json" \
              -H "Authorization: token $GITHUB_TOKEN" \
              "https://api.github.com/repos/benbitrise/addly/actions/artifacts/$ARTIFACT_ID/zip" \
              -L -o artifact.zip
            unzip artifact.zip
            mv Addly.ipa $BITRISE_DEPLOY_DIR/
        title: Download Github Actions Artifact
    - deploy-to-bitrise-io@2: {}
    - slack@4:
        inputs:
        - channel: mobile-team
        - text: "The new app is available at $BITRISE_PUBLIC_INSTALL_PAGE_URL"
        - api_token: "$SLACK_TOKEN"
meta:
  bitrise.io:
    stack: linux-docker-android-22.04
    machine_type_id: standard
trigger_map:
- push_branch: *
  workflow: distribute_app
- pull_request_source_branch: "*"
  workflow: distribute_app
If you don’t use Github Actions, you’ll need to tweak the download script for your CI tool, but the general template will remain the same.
Putting it all together
The concept here is simple. Use your existing CI tool, but add a step at the end that triggers small piece of automation on Bitrise that republishes the executable and informs your team where they can download it.
My personal thoughts on AppCenter being shuttered
I work at Bitrise, so I viewed AppCenter as a competitor. Regardless, it’s a shame they are closing. When HockeyApp, the ancestor of AppCenter, was acquired by Microsoft, someone at Microsoft clearly understood that mobile teams are behind their peers when it comes to devops practices. They recognized the benefit they could provide these mobile teams by turning HockeyApp into a purpose-built, complete devops platform with tools for building, testing, deploying, and monitoring mobile apps. So it’s a pity that at some point it became a distraction within Microsoft, and it ultimately got tossed in the garbage.
On the flip side, at Bitrise we have a similar goal in mind—a complete platform that helps teams achieve an effective devops practice for mobile. We’re doing a really good job of it, so give us a look.